Crafting Your Unique Style: Making Your Own Bolo Ties
Bolo ties are not just a piece of jewelry; they're a statement of individuality and personal style. Make your own bolo tie allows you to showcase your creativity and fashion sense while also honoring a tradition that has been cherished for generations. In this blog, we'll explore the art of crafting your own bolo ties, step by step.
Why Make Your Own Bolo Ties?
Bolo ties have a rich history, originating in the American Southwest and embodying the spirit of the West. By crafting your own bolo ties, you can:
Express Your Unique Style: Custom bolo ties are a reflection of your personal taste, and they can be as simple or elaborate as you desire.
Celebrate Tradition: Pay homage to the cultural significance of bolo ties while adding a modern twist to this iconic piece of fashion.
Create Meaningful Gifts: Handcrafted bolo ties make heartfelt gifts for friends and loved ones, especially when you tailor them to their preferences.
Materials Needed
Before you start crafting your bolo tie, gather the following materials:
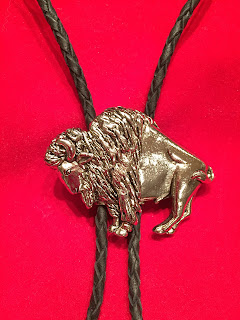
Bolo Slide: The centerpiece of your bolo tie, it's where the cord will pass through. Choose one that suits your style.
Cord or Leather: Select a cord or leather strip that complements your bolo slide. Ensure it's long enough to hang comfortably around your neck.
Decorative Tips: These hold the ends of the cord or leather in place. They come in various styles, from classic to ornate.
Adhesive: You'll need glue suitable for bonding the tips to the ends of the cord or leather.
Decorative Elements: This can include beads, pendants, or other embellishments to customize your bolo tie.
Steps to Craft Your Bolo Tie
Prepare Your Workspace: Find a clean, well-lit area to work. Lay out your materials.
Measure and Cut the Cord or Leather: Determine the desired length for your bolo tie and cut the cord or leather accordingly. Ensure it's long enough to hang comfortably.
Attach the Tips: Apply adhesive to the ends of the cord or leather and slide them into the decorative tips. Allow the adhesive to dry according to the manufacturer's instructions.
Choose and Position the Bolo Slide: Select the bolo slide you prefer and center it on the cord or leather.
Secure the Bolo Slide: Gently crimp the bolo slide onto the cord or leather to keep it in place. Make sure it's secure but not too tight, allowing for movement.
Add Decorative Elements: Enhance your bolo tie by threading on beads or pendants. Be creative and make it your own.
Adjust the Length: Try on your bolo tie and adjust the length as needed. You want it to hang comfortably on your chest.
Final Thoughts
Crafting your own bolo ties is a creative and fulfilling process that allows you to express your unique style and embrace a rich cultural tradition. Whether you make bolo ties for yourself or as meaningful gifts for others, each piece you create will be a one-of-a-kind work of art.
With a little time, effort, and imagination, you can craft bolo ties that are both stylish and meaningful. So, pick up your materials and start crafting – your journey to a more personal and distinctive wardrobe has just begun!

Comments
Post a Comment