How to Make a Bolo Slide: A Step-by-Step Guide for Beginners
If you’re searching for how to make a bolo slide, you’re likely interested in creating a custom Western accessory that stands out. A bolo slide is the centerpiece of a bolo tie—it holds the cord together and showcases your unique design. Whether you’re a DIY enthusiast or a Western fashion lover, making your own bolo slide is both fun and rewarding.
At Rocky Mountain Western, you’ll find inspiration and high-quality materials to help you craft a bolo slide that reflects your personal style.
What Is a Bolo Slide?
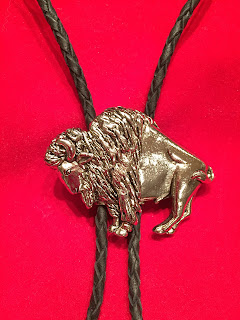
A bolo slide is the decorative clasp that secures the cords of a bolo tie. It can be made from various materials like metal, stone, wood, or resin. The slide not only holds the tie in place but also acts as the main visual feature.
Tools and Materials You’ll Need
Before you start, gather these basic supplies:
● Decorative piece (metal concho, stone, or custom design)
● Bolo tie slide back or clip
● Strong adhesive (like epoxy glue)
● Leather or braided cord
● Scissors or wire cutters
● Optional: drill, pliers, or polishing tools
Choosing quality materials ensures durability and a professional finish.
Step-by-Step: How to Make a Bolo Slide
1. Choose Your Design
Start by selecting the centerpiece of your bolo slide. This could be:
● A Western-style concho
● A polished stone like turquoise
● A custom metal or engraved piece
Your design should reflect your personal taste and the look you want to achieve.
2. Attach the Slide Back
The slide back is the mechanism that allows the bolo tie to move up and down.
● Flip your decorative piece over
● Apply a small amount of strong adhesive
● Press the slide back firmly into place
● Let it cure according to the glue instructions
Make sure it’s centered and secure to avoid uneven wear.
3. Prepare the Cord
Cut your leather or braided cord to your desired length. Most bolo ties range between 36 and 42 inches.
● Attach metal tips (optional) for a polished look
● Ensure both ends are even
This step helps your bolo tie look balanced and professional.
4. Thread the Cord Through the Slide
Once the slide back is fully dry:
● Insert both ends of the cord through the slide
● Adjust it to ensure smooth movement
The slide should move easily but still hold its position when worn.
5. Finishing Touches
Inspect your bolo slide for any imperfections:
● Clean off excess glue
● Polish the decorative piece
● Test durability by gently pulling the cord
A well-finished slide enhances both function and style.
Tips for Making a Professional-Looking Bolo Slide
● Use strong adhesive: Cheap glue can weaken over time
● Keep it centered: Proper alignment improves appearance
● Choose durable materials: Metal and stone last longer
● Avoid overdesigning: Simple designs often look more elegant
These tips help your DIY project look store-quality.
Creative Ideas for Custom Bolo Slides
If you want to get creative, try these ideas:
● Engraved initials or logos
● Vintage coins or medallions
● Natural elements like wood or antler
● Gemstones for a bold statement
Custom bolo slides make great gifts and unique fashion pieces.
Why Choose Rocky Mountain Western?
If DIY isn’t your style or you want premium components, Rocky Mountain Western offers expertly crafted bolo ties and accessories. Their collection combines traditional Western craftsmanship with modern design, giving you reliable and stylish options.
Final Thoughts
Learning how to make a bolo slide is a great way to express creativity while embracing Western fashion. With the right materials and a bit of patience, you can create a unique accessory that reflects your personality.
Whether you’re crafting your own or exploring ready-made designs from Rocky Mountain Western, a well-made bolo slide adds character and charm to any outfit.

Comments
Post a Comment