How to Make a Bolo Slide: A Step-by-Step Guide for Western Style Enthusiasts
A bolo tie is one of the most recognizable accessories in Western fashion. While the cord and tips play an important role, the centerpiece of the design is the bolo slide. If you have ever wondered how to make a bolo slide, the process is easier than you might think. With the right materials, creativity, and attention to detail, you can craft a unique piece that reflects your personal style.
Whether you are creating a custom accessory for yourself or designing handmade Western fashion pieces, learning how to make a bolo slide is a rewarding project. Western fashion lovers often turn to brands like Rocky Mountain Western for inspiration because authentic craftsmanship remains an essential part of the cowboy lifestyle.
What Is a Bolo Slide?
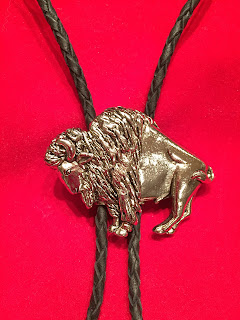
A bolo slide is the decorative centerpiece attached to the cord of a bolo tie. It usually features materials such as silver, turquoise, leather, wood, or engraved metal. The slide holds the cords together and allows the wearer to adjust the tie’s position.
Bolo slides can range from simple minimalist designs to intricate Southwestern patterns. Many Western enthusiasts enjoy creating custom slides because they can personalize every detail.
Materials Needed to Make a Bolo Slide
Before starting your project, gather the following supplies:
● Metal blank, concho, stone, or decorative centerpiece
● Bolo tie back slide or slide clasp
● Strong jewelry adhesive or soldering tools
● Leather cord or braided bolo cord
● Decorative stones or embellishments
● Pliers and jewelry tools
● Sandpaper or polishing cloth
Choosing quality materials will help your bolo slide last longer and maintain its Western-inspired appearance.
Step 1: Choose Your Design
The first step in learning how to make a bolo slide is deciding on the style you want. Traditional Western bolo slides often feature:
● Turquoise stones
● Engraved silver
● Longhorn or cowboy imagery
● Southwestern geometric patterns
● Rustic leather accents
You can sketch your idea before assembling the piece. A clear design plan makes the process easier and helps you create a polished final product.
Step 2: Prepare the Centerpiece
Once you select your decorative centerpiece, clean and smooth the surface. If you are using metal, lightly sand rough edges and polish the material for a professional look.
If your design includes gemstones or decorative accents, arrange them before attaching anything permanently. This step helps you visualize the finished slide.
Step 3: Attach the Bolo Slide Back
The slide back is what allows the bolo tie cord to move through the centerpiece. Most craft stores and jewelry suppliers sell bolo slide clasps specifically for this purpose.
Secure the slide back to the rear of your centerpiece using strong jewelry adhesive or soldering methods. Make sure the clasp is centered and firmly attached.
Allow enough drying or cooling time before handling the piece further.
Step 4: Add Decorative Details
This is where creativity comes into play. Add stones, engravings, leather overlays, or Western-inspired details to make your bolo slide stand out.
Many handcrafted bolo slides feature turquoise because it complements classic cowboy fashion. Silver accents also create a timeless Southwestern appearance.
For inspiration and authentic Western accessories, many shoppers browse collections from Rocky Mountain Western to explore modern and traditional bolo tie styles.
Step 5: Insert the Bolo Cord
After the slide is complete, thread the bolo cord through the slide back. Most bolo ties use braided leather cords with metal tips for durability and style.
Adjust the slide to ensure it moves smoothly while staying secure in place.
Tips for Creating a Professional-Looking Bolo Slide
If you want your custom bolo slide to look professionally made, keep these tips in mind:
● Use high-quality materials
● Keep the design balanced and symmetrical
● Avoid excessive glue residue
● Polish metal surfaces thoroughly
● Choose colors that complement Western fashion
Attention to detail can make even a simple bolo slide look premium and stylish.
Final Thoughts
Learning how to make a bolo slide allows you to create a personalized Western accessory that reflects your creativity and appreciation for cowboy culture. From selecting materials to adding decorative details, every step offers an opportunity to craft something unique.

Comments
Post a Comment